|
![]()
 |
Back to "How to Build P-40"
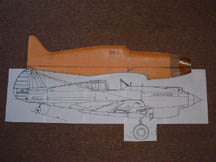
Fuselage construction |
 |
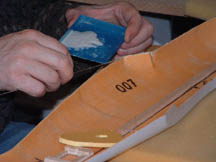
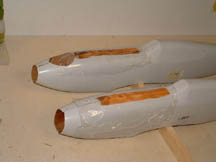
-Cut out 4 -1 ½" X 1" fiberglass pieces
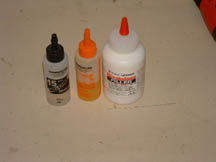
-Use 12-15min epoxy -Soak them in epoxy and apply where shown on the picture -Two on each half of the fuselage |
 |
|
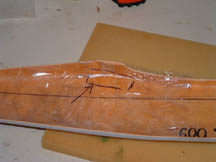 |
-Apply plastic food wrap on each piece of fiberglass |
 |
-Make sure to take all air bobbles out from under the plastic food wrap |
 |
|
 |
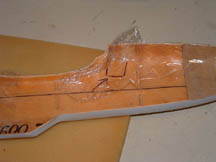
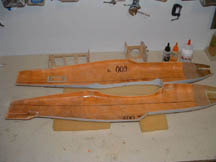
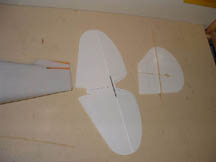
-Line up two halves of the fuselage tail to tail -Make sure that the lines on each halves are making one straight line -Use a ruler to make sure -Draw a slot for stab parallel to the line below as shown on the picture |
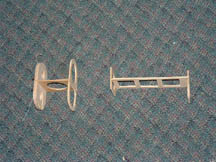 |
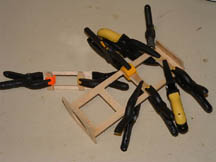
-Take all wooden pieces for the inside structure and
glue them together like on the picture -You can use either epoxy or "Elmer's Glue-All Multipurpose Glue" |
 |
|
 |
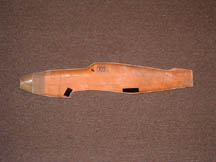
-Use epoxy to glue elevator servo mounting-frame on to the left fuselage half as shown on the picture |
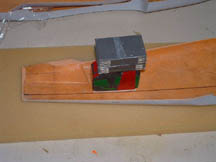 |
-Put the left fuselage half on something soft -Apply weight on top of the servo mounting-frame |
 |
-For glueing fuselage halves and inside structure use
30 min epoxy (optional: mix epoxy with Microballoons Filler ) -Put one of the fuselage halves on something like a pillow and glue inside structures first to that half on indicated spots -Apply weight on top of the structures |
 |
-After epoxy dries mix more epoxy and apply on all surfaces
that needs to be glued together on the fuselage halves and on interior
structure |
 |
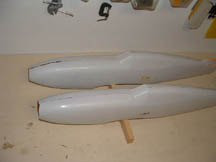
-Put two fuselage halves together so that everything
lines up -Use masking tape or transparent ½ " tape for holding the fuselage halves together for the time of epoxy curing -Apply those pieces of tape so that they would hold the halves with some tension |
 |
-When epoxy cured remove the tape pieces |
 |
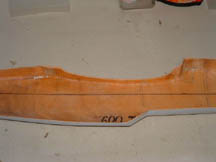
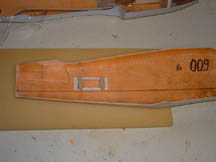
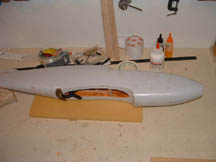
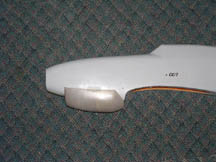
-Send the bottom surface as shown on the picture in
order to remove all the primer on the front part of the fuselage (where
it was glued together) -Cut a stripe of fiberglass material long enough to go from the front to the beginning of the wing -Soak the stripe in epoxy, remove most of the epoxy from the stripe -Apply it to the surface of the fuselage -Cover it with plastic food wrap -Stretch plastic food wrap and tape it down to the sides of the fuselage -Use your finger to push out air bubbles as mush as possible from under the plastic food wrap |
 |
|
 |
-Do the same process on the top as shown on the picture |
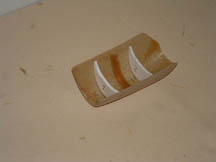 |
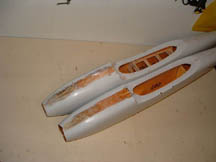
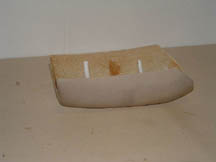
-Glue the reinforcements inside the radiator scoop as
shown on the picture with epoxy |
 |
|
 |
-Apply epoxy to all surfaces that will be touching the fuselage (reinforcements must be glued to the bottom surface of the fuselage) |
 |
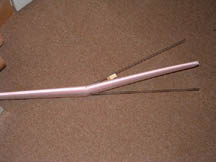
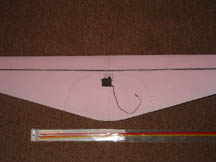
Tail feathers-Reinforce coroplast stab with either 4-5 bamboo skewers or 1-2 fiberglass rods -Reinforce coroplast vertical fin with 1-2 bamboo skewers -You can use Gorilla glue or epoxy |
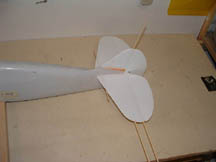 |
-Apply epoxy to the fuselage tail slot's surfaces -Slide stab and vertical fin into the tail slots -Let it dry completely |
|
-Cut out the shape you want for the engine in front of the firewall -Recommended engine position is engine head up |
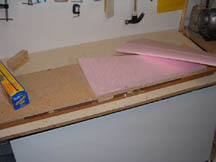 |
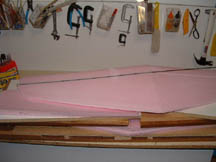
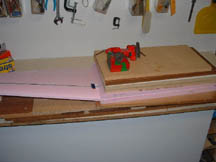
Wing construction-Lay bottom wing core cover on the flat surface -Cover it with a plastic food wrap |
 |
-Lay the wing core top side up in the wing core cover |
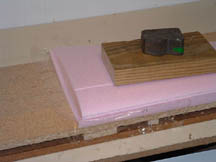 |
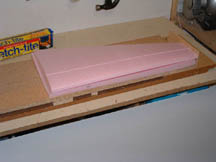
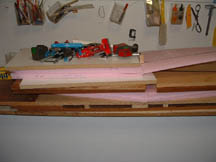
-Put some weight as shown on the picture to keep wing core from sliding |
 |
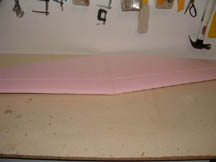
-Apply epoxy on the wing core's area of each wing cores where in the middle the going to be glued together -Put the wing cores together so that they were pressed together for the time of epoxy curing |
 |
-Make sure that both wing cores are aligned in respect to each other |
 |
|
 |
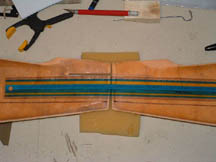
-Apply epoxy in the slots for the top and bottom fiberglass rods, first only on the ether left or right wing core -Tape both top and bottom fiberglass rods where they are glued -You can use bi-di tape (recommended) or any other one |
 |
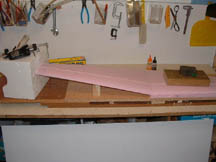
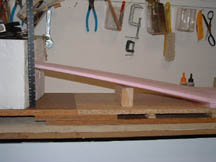
-Put the side of the wing to which you have applied epoxy into the wing cores covers top side of the wing up -Apply heavy object(s) on top as shown on the picture and leave it to cure |
 |
-When it cured, apply epoxy to the other side |
 |
|
 |
-Repeat the process like with the other side |
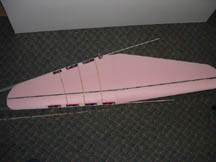 |
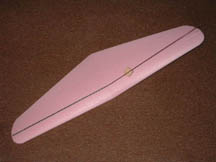
-Apply epoxy to the leading edge and the back slots of either left or right side of the wing first only -Insert the fiberglass rods that left, into the slots -Tape the leading edge and the back sides with some tape which later you will remove -Put several rubber bands and insert something hard between rubber bands and the rods |
 |
-Repeat the process on the other side |
 |
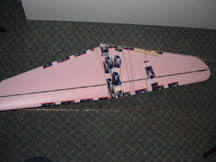
Servo(s) and push rods installation-You can use two servos system or one servo system like shown on the image -For one servo system use template for drawing the groove for the flexible push rods |
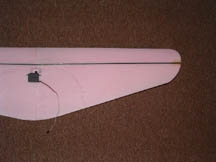 |
-Place a servo on the wing so that control horn of the servo is on the line of push rods' grooves and position right above the line of the wing joining line -Use the servo contour as a template to outline the servo -Use a very sharp thin-bladed knife to cut foam vertically along the outline to the depth of the servo just on inside of the shape, so that when you will install the servo, it would hold tit in the wing -Carve the shape of the servo out deep enough so that upper wall would be 1/8 of an inch lower than the surface of the wing |
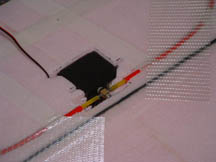 |
-Take three piece of the half-inch directional tape -Tape the end of one tape piece a half of an inch away from one end of the sleeve -Tape the second piece same direction and the way as the first
one at the end of the sleeve -Tape the third piece same way as the others but in opposite direction
at the middle of the push rod sleeve -Repeat the process with the other push rod sleeve -Take the push rods sleeves and slide them on each push rod -Place the push rods' sleeves into the grooves -Tape those tape peses to the wing surface with some tension -Apply bi-di tape on top of the push rods
|
|
#
|
KIT Includes |
| 1 | Two fuselage halves |
| 1 | radiator scoop |
| 1 | coroplast material for the tail feathers |
| 1 | 15 psi CNC cut foam cores |
| 1 | 72" x 1/8" fiberglass rods for top and bottom spars |
| 2 | 36" x 3/8" x 1" aileron stock |
| 1 | metal rod for connecting two halves of the elevator control surfaces |
| 2 | 1/4 inch wood (for the rubber bands hook up) |
| 8 | bamboo skewers |
| # |
Requires: |
| 1 | .25 cu in engine |
| 1 | Remote control radio with receiver, battery pack, 3-4 servers |
| 1 | Roll of bi-directional packing tape |
| 1 | Roll of directional packing tape |
| 1 | 15-30 minute Epoxy |
| 2 | control horns push rods |
| 1 | fiberglass material (which you can get from any local Hobby store) |
| Wing covering material, tape, nylon, etc. | |
| Top Flight Microballoons Filler (optional for mixing with epoxy) | |
| Elmer's Glue-All (Multi-purpose Glue) | |
![]()
![]()

Copyright © AMOCS LLC